
-
Step 1: Access the Job
-
Step 2: Start a New Data Center SPA
-
Step 3: Complete the SPA Workflow
-
Step 4: NTP Approval
-
Step 5: Site Checkout
🎥 Training Video 🎥
How to Complete a Data Center SPA
Step 1: Access the Job
- Open the Pathwave mobile app
- Tap the Jobs icon from the homepage
- Select All Jobs Not Completed
- Tap the appropriate job to open the Job Details page
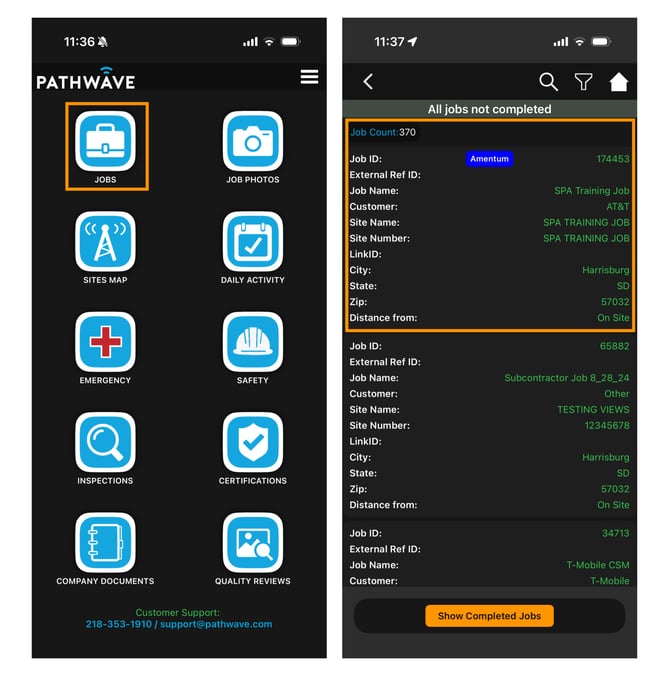
Notes:
-
Jobs in Ready status will appear
-
The job closest to your location is listed first
-
Use the filter icon (top-right) to search by job name, job ID, or other identifiers
Step 2: Start a New SPA
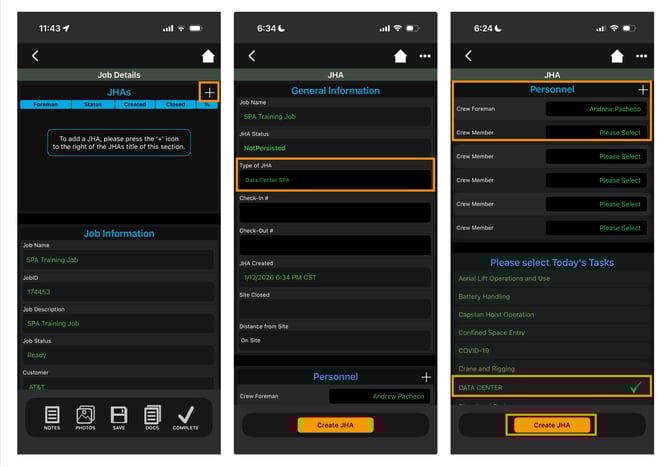
- On the Job Details page, locate the JHAs section
-
Tap the white plus (+) button to create a new SPA
-
The General Information screen will appear (pre-filled with job data)
- Choose the appropriate JHA Type:
- Data Center SPA
-
Select all personnel participating in the work that day
-
Select Data Center for Today's Tasks
-
Tap Create JHA to launch the full Data Center SPA form
Step 3: Complete the SPA Workflow
The Pathwave app will guide you through each stage of the Data Center SPA. The current stage will be highlighted in blue at the bottom of the screen.
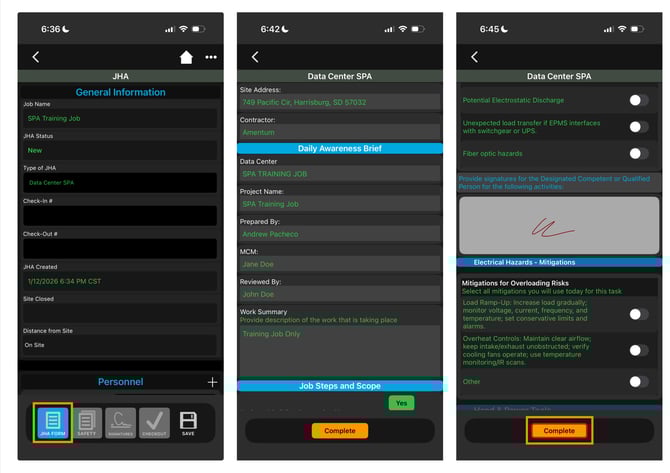
A. Data Center SPA Form
-
Complete all required safety questions
-
Required fields must be completed to proceed
-
Missing items are highlighted in red
-
Tap Complete when finished
-
Selecting the correct Project Type determines which Scope of Work section groups appear next — you'll only need to complete the sections tied to your selected project type.
-
Navigate between sections using the orange Next Page icon at the bottom of the screen, or by tapping Scope of Work in the description bar at the top and choosing the project type directly.
-
Each Scope of Work requires you to select the tasks being performed that day. Take the time to do this carefully, and discuss the task list with your crew before finalizing it — a task that isn't selected isn't covered under the SPA, and none of the hazards or controls tied to it get captured either.
-
Identify every hazard associated with today’s work. This determines which hazard-specific follow-up questions apply moving forward.
-
Walk through the day's work step by step with your crew rather than defaulting to habit or yesterday's job. It's normal for this section to take a few minutes to get through carefully — that time is well spent, since the hazards you select here drive the controls, PPE, and equipment questions that follow.
-
Continue through all questions tied to the hazards you selected, then complete the Equipment section that follows.
-
As you reach the end of the SPA Form, you’ll arrive at the Daily Badging Protocol section (see below).
B. Complete the Daily Badging Protocol
Every participant listed on the SPA must watch the Daily Badging Protocol: Preventing Door Alarms video together before badge-controlled work begins.
- Tap the orange Reference icon.
- Select Watch Required Video.
- Watch the entire video as a group.
- Review and sign the acknowledgment statement. Signing confirms that everyone listed has watched the video, understands the badging protocol, and is cleared to begin badge-controlled work.
- Tap Complete.
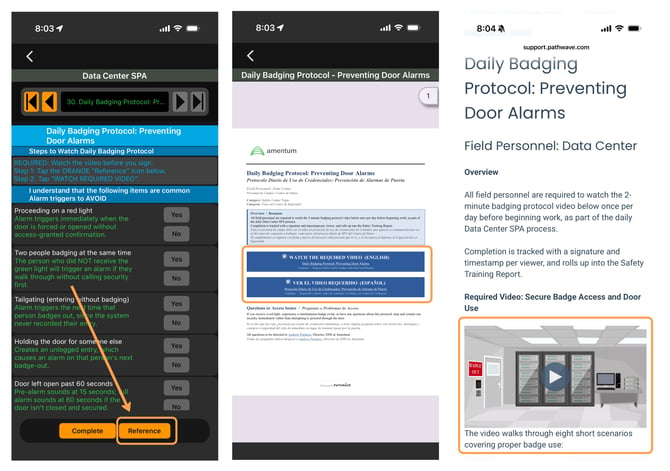
Important: This step can't be skipped or rushed — the full video must be watched together by every participant listed on the SPA.
C. Safety Forms
-
Additional safety forms may be triggered based on Data Center SPA responses
-
Required forms are marked Yes in the Required column
-
Complete all required forms
-
Tap Continue to proceed

D. Signatures
-
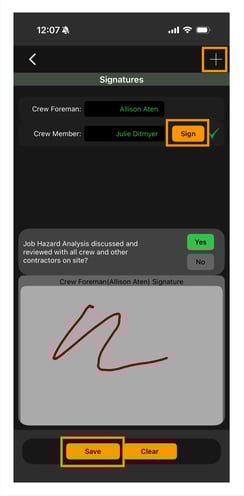
All participating team members must provide a digital signature
-
To add walk-on personnel, tap the white plus (+) icon
-
Once all signatures are collected, the Data Center SPA is fully submitted
Step 4: Notification & Approval
-
The assigned Subcontractor PM or CM receives an email and text notification
-
They review the Data Center SPA and issue the Notice to Proceed (NTP) from the Pathwave portal or app
-
Once approved:
-
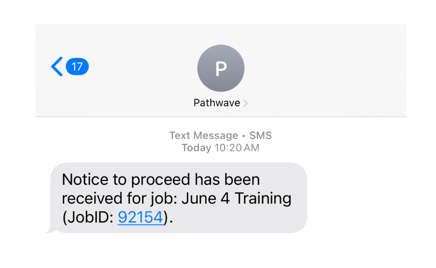
The Foreman automatically receives a text message confirming NTP issuance
-
Important: Work must not begin until the Notice to Proceed has been issued.
-
-
How to Issue a Notice to Proceed (NTP)
-
Step 5: Site Checkout
At the end of the workday, crews must complete Site Checkout.-
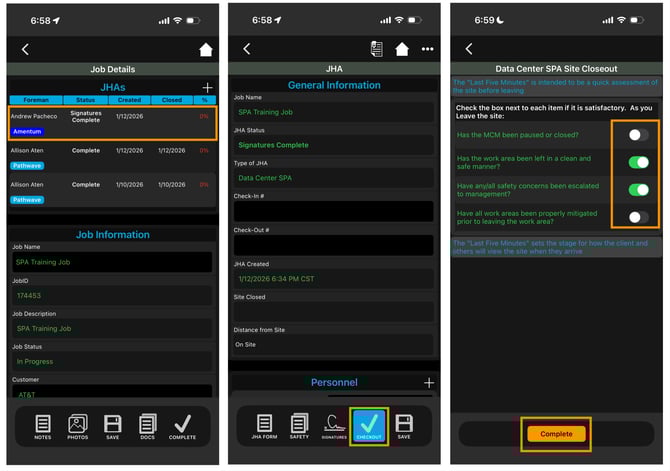
Return to the Job Details page
-
Open the Data Center SPA submitted earlier that day
-
Select the Site Checkout icon (highlighted in blue)
-
Answer the checkout questions
-
Select Complete
Need Help?
- If you have any questions or run into issues:
- Email Support: support@pathwave.com
- Pathwave Support: 218-353-1910